Find out about how to update the details of existing merchants in Connect
The update feature is exclusively available for stores with a 'Live' status. For the initial release, please continue to contact the Wpay Support Hub for any terminal configuration updates, including the addition or deactivation of lane.
High level store update process flow
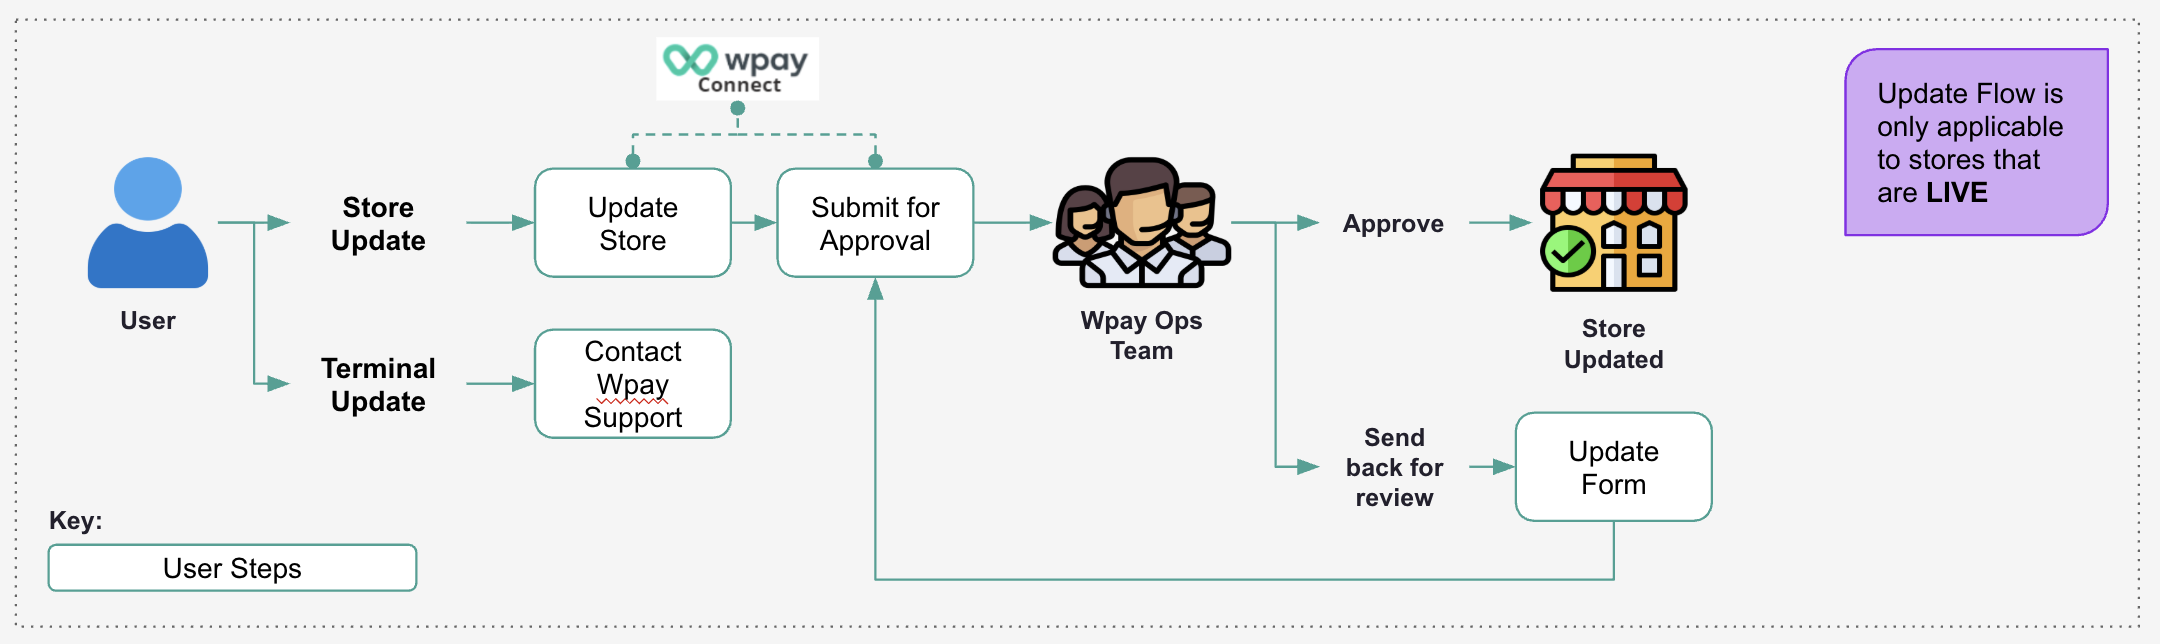
Here is a breakdown of the key steps:
| Screen name | Description |
| Store listing | Upon signing in, navigate to ‘Stores’ on the leftmost panel to bring up the store listing screen. Locate the store you would like to update using filters available. |
| Store onboarding | Update the fields in the relevant tabs, and hit ‘Save’ once done with the update. Note: To prevent delays downstream and reduce the risk of your application being returned for review, please adhere to the form population rules stipulated in the training guide. If you are unsure or have any questions regarding these rules, please reach out to your dedicated Wpay contact. |
| Store overview | Once all the updates have been made, hit ‘Submit for approval’ and then ‘Yes’. Back in the store overview screen, the application type will show as ‘Update’ and the application status will show as ‘In review’. |

Fields that can be updated:
| Screen name | Description |
| Store profile |
|
| Store address and contact |
|
| Settlement details |
|
| Payment schemes |
|
| Merchant service fee |
|
The following screenshots highlight the specific fields available for modification once a store is live and onboarding is completed: